Publish releases to PyPI from GitHub Actions without a password or token
I published a package to PyPI today using their Trusted Publishers mechanism for the first time.
Update 17th January 2024: My python-lib cookiecutter template now implements this pattern, see Publish Python packages to PyPI with a python-lib cookiecutter template and GitHub Actions for details.
Trusted Publishers provides a mechanism for configuring PyPI to allow a specific GitHub Actions workflow to publish releases to PyPI without needing to use a password or token.
It's based on OpenID Connect, but you don't need to know the details of that at all.
It took me a few iterations to get it to work, but now that I've done it once I plan to use it for all of my PyPI packages going forward.
It only takes three steps:
- Tell PyPI which GitHub repository should be allowed to publish a package with a specific name
- Configure a GitHub Actions publish workflow to use the
pypa/gh-action-pypi-publish@release/v1action - Publish a release to GitHub that triggers the workflow
In the past I've had to create a token on PyPI and paste it into a GitHub Actions secret. That's no longer necessary with this approach.
This process differs slightly depending on if you are planning on publishing a brand new package or updating an existing one to use Trusted Publishers going forward.
When publishing a brand new package you can instead use a special mechanism called "pending publishers".
This also lets you reserve a package name before you publish the first version. I like this - in the past I've attempted to publish a package only to discover that someone else had already reserved a too-similar name.
You can create a new pending publisher from this page: https://pypi.org/manage/account/publishing/
You need to provide the PyPI project name, the GitHub repository owner and name, the workflow name (the name of a YAML file) and an optional environment name.
Here's how I filled out that form for my new datasette/datasette-build repository:
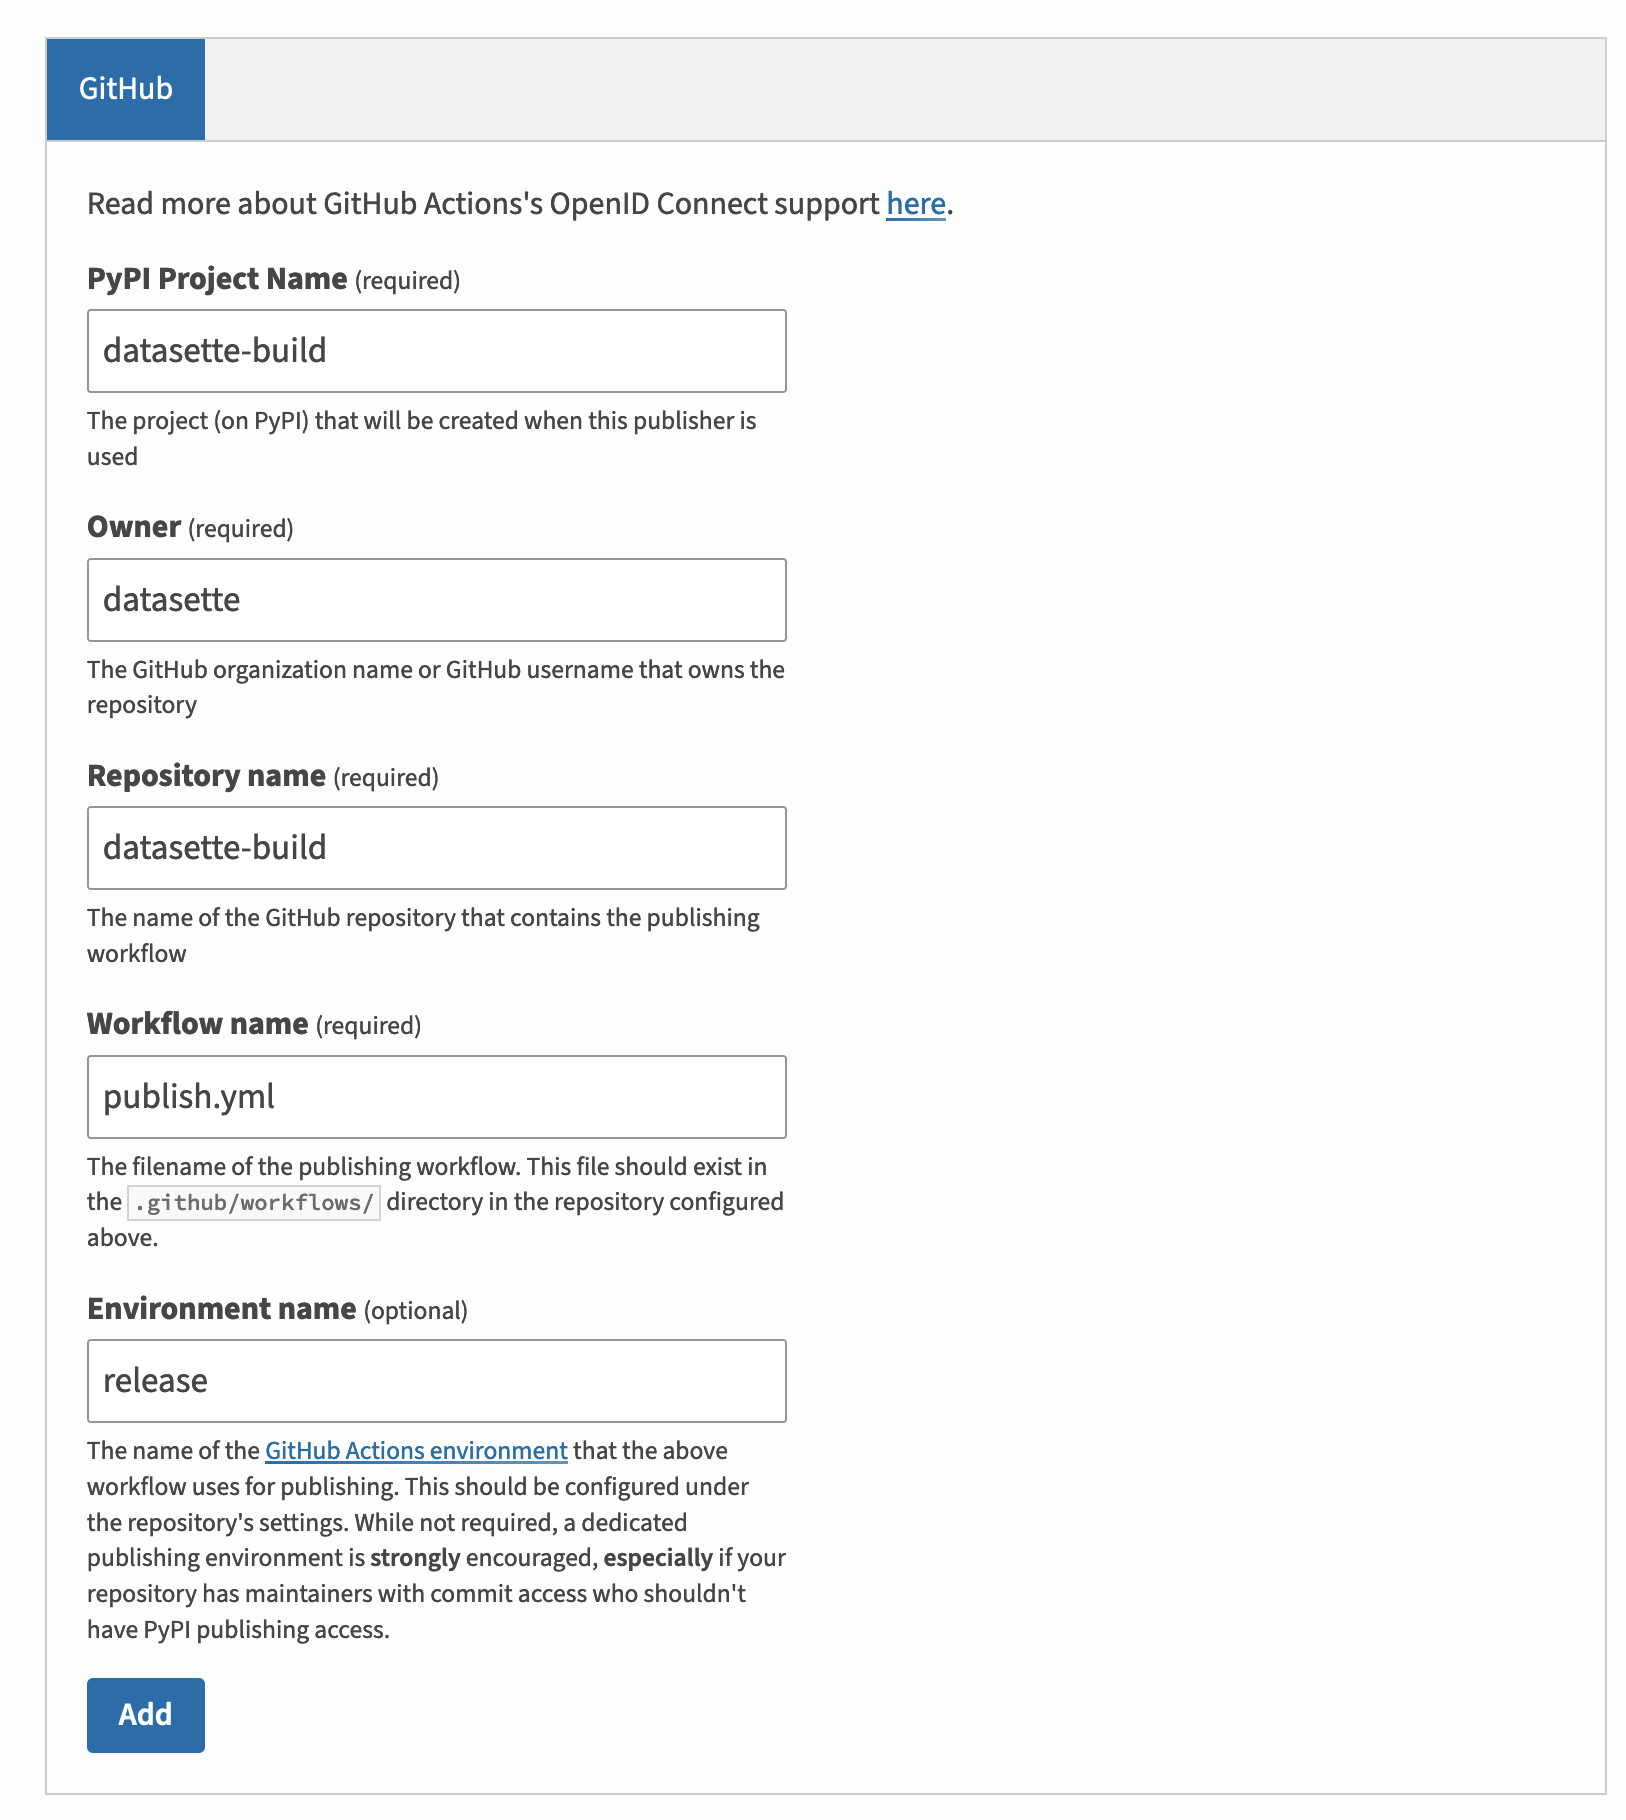
I used publish.yml as the name of my workflow file.
I also set the environment to release. I don't fully understand GitHub Actions environments yet, but the PyPI documentation suggested this was a good idea and I think it gives me more flexibility for setting extra permissions in the future.
PyPI says:
While not required, a dedicated publishing environment is strongly encouraged, especially if your repository has maintainers with commit access who shouldn't have PyPl publishing access.
Since we specified the environment on PyPI we need to create that environment. That can be done in the settings area for the repository - in my case that page was here:
https://github.com/datasette/datasette-build/settings/environments/new
Environments just have a name. I called mine release.
This took me the most time to figure out. I already have a publish.yml workflow I use for my other projects, which uses twine and a PyPI token to upload packages, after first running the tests.
Here's the workflow I eventually landed, in .github/workflows/publish.yml:
name: Publish Python Package

on:
  release:
    types: [created]

jobs:
  test:
    runs-on: ubuntu-latest
    strategy:
      matrix:
        python-version: ["3.8", "3.9", "3.10", "3.11"]
    steps:
    - uses: actions/checkout@v4
    - name: Set up Python ${{ matrix.python-version }}
      uses: actions/setup-python@v5
      with:
        python-version: ${{ matrix.python-version }}
        cache: pip
        cache-dependency-path: '**/pyproject.toml'
    - name: Install dependencies
      run: |
        pip install -e '.[test]'
    - name: Run tests
      run: |
        pytest
  deploy:
    runs-on: ubuntu-latest
    needs: [test]
    environment: release
    permissions:
      id-token: write
    steps:
    - uses: actions/checkout@v4
    - name: Set up Python
      uses: actions/setup-python@v5
      with:
        python-version: '3.11'
        cache: pip
        cache-dependency-path: '**/pyproject.toml'
    - name: Install dependencies
      run: |
        pip install setuptools wheel build
    - name: Build
      run: |
        python -m build
    - name: Publish
      uses: pypa/gh-action-pypi-publish@release/v1
The test job is pretty standard - it sets up a matrix to run the tests against multiple Python versions, then runs pytest.
It's set to trigger by this block:
on:
  release:
    types: [created]
This ensures the workflow runs any time a new GitHub release is created for the repository.
Where things get interesting is the deploy job. It runs python -m build to build the .tar.gz and .whl files, then uses the pypa/gh-action-pypi-publish@release/v1 action to publish the package.
Breaking that down a bit:
  deploy:
    runs-on: ubuntu-latest
    needs: [test]
    environment: release
    permissions:
      id-token: write
The environment: release key is needed because we configured an environment in PyPI. I think that can be omitted entirely if the PyPI environment field was left blank.
The permissions block there is essential - it's required for the OpenID Connect token authentication to work.
needs: [test] means that this job waits for the test job to pass before it runs.
    - name: Publish
      uses: pypa/gh-action-pypi-publish@release/v1
This is the key line. It uses the pypa/gh-action-pypi-publish action to publish the package.
Note that it doesn't need any settings - it just works, provided the trusted publisher on PyPI has been configured.
With all this in place, all that's needed to ship a package is to ensure the version is set correctly in the pyproject.toml file (or setup.py file if you're using that instead), then create a new release on GitHub.
For my repo I create a release using this form: https://github.com/datasette/datasette-build/releases/new
Creating the release triggers the workflow, which runs the tests, builds the package and then publishes it to PyPI.
Here's the resulting package: pypi.org/project/datasette-build/
Here are the instructions for upgrading an existing package.
I tried this myself for datasette-edit-templates. Here's the diff. I used this process:
- Upgrade the
publish.ymldeploy step to includeenvironment: release,permissions: id-token: write, apython -m buildstep and thepypa/gh-action-pypi-publish@release/v1action. - Navigate to that projkect on PyPI and add a new trusted publisher - for my project that page was https://pypi.org/manage/project/datasette-edit-templates/settings/publishing/
- Create the environment called
releaseon the GitHub settings page for that repository. - Update the version number and create a new release.
The PyPI form looked like this:
Related
Created 2024-01-14T20:55:20-08:00, updated 2024-04-12T06:03:51-07:00 · History · Edit