Building an automatically updating live blog in Django
OpenAI's DevDay event yesterday (October 1st 2024) didn’t invite press (as far as I can tell), didn’t livestream the event and didn’t allow audience livestreaming either. I made a last minute decision to live blog the event myself.
I started brainstorming the implementation using Claude on my walk over to the venue. It suggested the same approach I was already considering: a LiveUpdate Django model with just content and a timestamp, attached to a specific blog post via a foreign key.
I built the first version while sat in the audience waiting for the keynote to start - thankfully it was delayed by 15 minutes giving me just enough time to ship something that worked.
The first version looked like this:
# in models.py
class LiveUpdate(models.Model):
    created = models.DateTimeField(auto_now_add=True)
    content = models.TextField()
    entry = models.ForeignKey(Entry, related_name="updates", on_delete=models.CASCADE)
    def __str__(self):
        return "{}: {}".format(self.created, self.content)

# in admin.py
@admin.register(LiveUpdate)
class LiveUpdateAdmin(admin.ModelAdmin):
    raw_id_fields = ("entry",)

# in urls.py
# ...
   re_path(r"^updates/(\d+)/$", blog_views.entry_updates),
# ...

# in views.py
def entry_updates(request, entry_id):
    entry = get_object_or_404(Entry, pk=entry_id)
    updates = list(entry.updates.order_by("created"))
    for update in updates:
        update.created_str = (
            str(update.created.astimezone(pytz.timezone("America/Los_Angeles")).time())
            .split(".")[0]
            .rsplit(":", 1)[0]
        )
    response = render(request, "entry_updates.html", {"updates": updates})
    response["Cache-Control"] = "s-maxage=10"
    return response
(That code for generating a timestamp as HH:MM while converting from UTC to US Pacific time is pretty gross, but I was in a hurry!)
A key detail here is that Cache-Control: s-maxage=10 HTTP header, telling Cloudflare to cache the polled endpoint page for ten seconds.
Plus a new template, templates/entry_updates.html:
{% for update in updates %}
<p><strong>{{ update.created_str }}</strong> {{ update.content|safe }}</p>
{% endfor %}
I also duplicated code to make that list of entries available in my entry page as well, and added this to my regular blog entry template:
{% if updates %}
<div id="live-updates">
{% for update in updates %}
<p><strong>{{ update.created_str }}</strong> {{ update.content|safe }}</p>
{% endfor %}
</div>
{% endif %}
These Django changes gave me three things:
- An admin interface for posting new live updates and having those persisted in my database
- Initial loads of my entry pages would display all live updates. Even without JavaScript users could refresh that page manually and get my latest updates.
- A new /updates/8523/ page serving just the live updates HTML block for the specified entry, designed to be polled by JavaScript and with a 10 second cache header aimed at ensuring Cloudflare (which runs in front of my blog) absorbs most of that polling traffic.
I knew exactly what wanted, so I told Claude to implement it for me:
Write JavaScript (no React) that polls /updates/1/ using fetch() and takes the HTML from that and injects it into innerHTML in a div with id='updates'
Claude gave me back this:
function pollUpdates() {
  fetch('/updates/1/')
    .then(response => response.text())
    .then(html => {
      document.getElementById('updates').innerHTML = html;
    })
    .catch(error => {
      console.error('Error fetching updates:', error);
    })
    .finally(() => {
      // Schedule the next poll after 5 seconds (5000 milliseconds)
      setTimeout(pollUpdates, 5000);
    });
}

// Start polling
pollUpdates();
My blog has a feature where I can specify extra HTML code to be included in the <head> of any blog entry, using a field in the Django Admin. I decided to use that so I could iterate on the JavaScript without deploying fresh code to Heroku on every change.
I deployed that first Django version and the accompanying JavaScript just in time to start writing about the opening keynote.
I used a little-known feature of the Django Admin to help me efficiently add new updates to the live blog.
“Add content” forms in the admin accept query string parameters which can be used to pre-populate form fields.
The form for updates was very simple: just a content textarea and a field for picking the entry to attach the update to.
I bookmarked this page (actually dropped the link in an Apple Notes document so it would be shared between my Mac and iPhone):
https://simonwillison.net/admin/blog/liveupdate/add/?entry=8523
Which gave me this form:
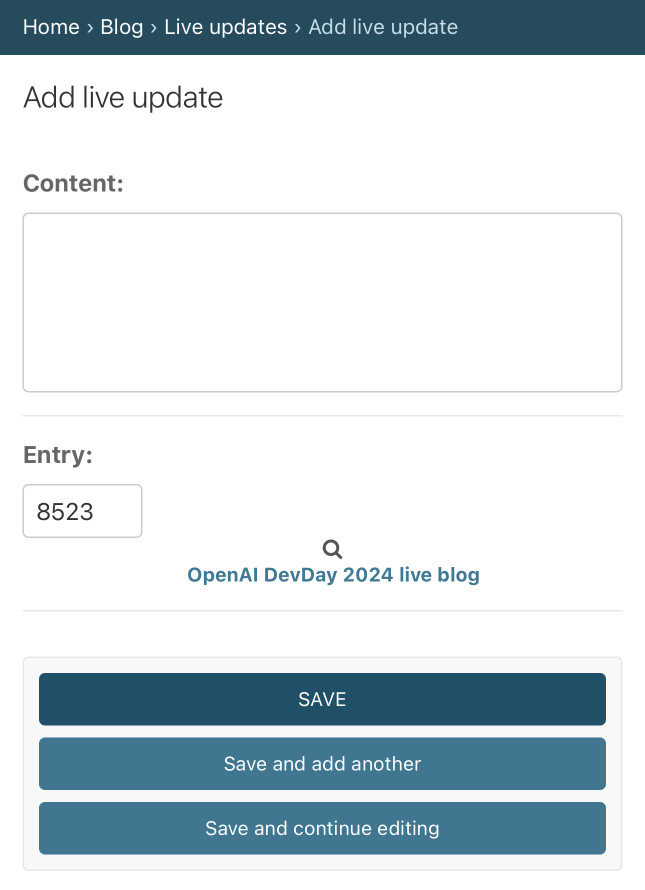
Then, to add an update all I had to do was enter the content and click the “Save and add another” button.
To my delight, this preserved that query string parameter - so every click of that button would post an update and take me back to the blank form with the correct entry ready to post another.
I implemented two feature requests during the break for lunch.
The first was sort orders. A few different people requested that new items should appear at the top of the page, not the bottom. I decided to make that optional, since I personally like the option of reading this kind of post in chronological order when it first loads.
The second was a bit more obscure: someone pointed out that because I was replacing the entire innerHTML on every poll any text they had selected to copy-and-paste out was unselected when the content refreshed.
That’s annoying! So I decided to switch up my approach and only fetch and update new content rather than replacing everything.
This required some backend changes over a few more commits.
First I added a new endpoint: /updates/128523.json, implemented like this:
def entry_updates_json(request, entry_id):
    entry = get_object_or_404(Entry, pk=entry_id)
    updates = entry.updates.order_by("created")
    since_id = request.GET.get("since")
    if since_id:
        updates = updates.filter(id__gt=since_id)
    response = JsonResponse(
        {
            "updates": [
                {
                    "id": update.id,
                    "created": update.created.isoformat(),
                    "created_str": (
                        str(
                            update.created.astimezone(
                                pytz.timezone("America/Los_Angeles")
                            ).time()
                        )
                        .split(".")[0]
                        .rsplit(":", 1)[0]
                    ),
                    "content": update.content,
                }
                for update in updates
            ]
        }
    )
    response["Cache-Control"] = "s-maxage=10"
    return response
Without arguments that returns the full stream of updates for a post. Or you can add ?since=204 to get back just updates with an ID higher then the one you pass in.
Again, these return an HTTP header telling Cloudflare to cache them for ten seconds - so even with hundreds of people polling for updates my server will see very little traffic.
I also needed hooks in the HTML to help with sort ordering and so the JavaScript could tell what IDs had been displayed already when the page first loaded.
I went with this HTML:
{% for update in updates %}
<div data-update-id="{{ update.id }}">
  <p><strong>{{ update.created_str }}</strong> {{ update.content|safe }}</p>
</div>
{% endfor %}
Next, the JavaScript. Since this was an OpenAI event I switched to ChatGPT 4o. You can see the full transcript here:
I prompted it with my existing JavaScript (written by Claude), an example of the new JSON endpoint format and a snippet of Django template for it to convert to JavaScript. Heres my initial prompt:
<script>
function pollUpdates() {
  fetch('/updates/8523/')
    .then(response => response.text())
    .then(html => {
      document.getElementById('live-updates').innerHTML = html;
    })
    .catch(error => {
      console.error('Error fetching updates:', error);
    })
    .finally(() => {
      setTimeout(pollUpdates, 5000);
    });
}

// Start polling
pollUpdates();
</script>
I now have an endpoint that returns this:
{"updates": [{"id": 1, "created": "2024-10-01T16:58:33.715856+00:00", "cerated_str": "09:58", "content": "aoentuhoantuhnotauo"}, {"created": "2024-10-01T16:58:36.155116+00:00", "created_str": "09:58", "content": "aoenuthaonutheoantuhenoatuhoet"}, {"id": 2, "created": "2024-10-01T16:58:38.174753+00:00", "created_str": "09:58", "content": "aoentuhaenotuhnaoetu"}]}I want the JavaScript to poll /updates/8523.json?since=2 - if the last thing it displayed was 2 - and then append the HTML for the whole thing to the div, generating that HTML using this template (ported from Django):
<p><strong>{{ update.created_str }}</strong> {{ update.content }}</p>
This gave me some initial code. I followed up with:
start with
lastUpdateIdset to null and do not send?since=xif that is null nstead ofinnerHTML+= use a more efficient appending mechanism - insert a fragment with all the new HTML after that, I don't wantto break selected text
And then:
The template is now
<p data-update-id="{{ update.id }}"><strong>{{ update.created_str }}</strong> {{ update.content|safe }}</p>- on first page load scan for the highest currentdata-update-idand use that as thelastUpdateIdto start with, if it is set
This gave me the JavaScript I needed for polling for JSON updates. The last requirement was the new sort feature:
Write a separate JavaScript function that finds the div with the live-updates ID and adds a link before it which starts as "Sort latest first" - clicking that switches it to "Sort oldest first" and re-orders the HTML elements by sorting them based on that data attribute. Also update the polling code to respect that setting
This gave me almost exactly the JavaScript I needed. I ended up having to wrap it all in this:
document.addEventListener("DOMContentLoaded", () => {
  // …
});
Because otherwise the code that scanned the DOM for the most recent update ID would run before the HTML had loaded.
Here’s the finished code, almost entirely written by GPT-4o:
document.addEventListener("DOMContentLoaded", () => {
const entryId = 8523;

let lastUpdateId = null; // Initially set to null
let sortOrder = 'oldest-first'; // Default sorting is oldest first

// Function to find the highest data-update-id from the current DOM
function findLastUpdateId() {
  const updateElements = document.querySelectorAll('[data-update-id]');
  let maxId = null;

  updateElements.forEach(element => {
    const updateId = parseInt(element.getAttribute('data-update-id'), 10);
    if (!isNaN(updateId) && (maxId === null || updateId > maxId)) {
      maxId = updateId;
    }
  });

  return maxId;
}

// Function to toggle the sort order and re-order the elements
function toggleSortOrder() {
  const toggleLink = document.getElementById('sort-toggle');
  const liveUpdatesDiv = document.getElementById('live-updates');
  const updates = Array.from(liveUpdatesDiv.children); // Convert HTMLCollection to array

  // Toggle the sort order
  if (sortOrder === 'oldest-first') {
    sortOrder = 'latest-first';
    toggleLink.textContent = 'Show oldest first';
  } else {
    sortOrder = 'oldest-first';
    toggleLink.textContent = 'Show latest first';
  }

  // Sort the updates based on data-update-id
  updates.sort((a, b) => {
    const aId = parseInt(a.getAttribute('data-update-id'), 10);
    const bId = parseInt(b.getAttribute('data-update-id'), 10);

    // Depending on the sort order, adjust the sorting logic
    return sortOrder === 'latest-first' ? bId - aId : aId - bId;
  });

  // Clear and re-append the sorted elements
  liveUpdatesDiv.innerHTML = '';
  updates.forEach(update => liveUpdatesDiv.appendChild(update));
}

// Function to insert the sort toggle link before the live-updates div
function addSortToggleLink() {
  const liveUpdatesDiv = document.getElementById('live-updates');
  const sortLink = document.createElement('a');
  sortLink.href = '#';
  sortLink.id = 'sort-toggle';
  sortLink.textContent = 'Sort latest first'; // Initially show "Sort latest first"
  sortLink.style.cursor = 'pointer';
  sortLink.style.display = 'block';
  sortLink.style.marginBottom = '10px';

  // Add click event to toggle sorting
  sortLink.addEventListener('click', (event) => {
    event.preventDefault();
    toggleSortOrder();
  });

  // Insert the link before the live-updates div
  liveUpdatesDiv.parentNode.insertBefore(sortLink, liveUpdatesDiv);
}

// Update polling function to respect the sorting
function pollUpdates() {
  let url = `/updates/${entryId}.json`;
  if (lastUpdateId !== null) {
    url += `?since=${lastUpdateId}`;
  }

  fetch(url)
    .then(response => response.json())
    .then(data => {
      const updates = data.updates;

      if (updates && updates.length > 0) {
        // Create a document fragment to batch updates
        const fragment = document.createDocumentFragment();

        updates.forEach(update => {
          // Create the new HTML for each update using the template
          const p = document.createElement('p');
          p.setAttribute('data-update-id', update.id);
          const strong = document.createElement('strong');
          strong.textContent = update.created_str;
          p.appendChild(strong);
          const span = document.createElement('span');
          span.innerHTML = ' ' + update.content;
          p.appendChild(span);

          // Append the new <p> element to the fragment
          fragment.appendChild(p);

          // Update the lastUpdateId with the latest ID
          if (update.id) {
            lastUpdateId = update.id;
          }
        });

        // Insert updates in the correct order based on the sortOrder
        const liveUpdatesDiv = document.getElementById('live-updates');
        if (sortOrder === 'oldest-first') {
          // Append updates to the end for "oldest-first"
          liveUpdatesDiv.appendChild(fragment);
        } else {
          // Prepend updates for "latest-first"
          liveUpdatesDiv.insertBefore(fragment, liveUpdatesDiv.firstChild);
        }
      }
    })
    .catch(error => {
      console.error('Error fetching updates:', error);
    })
    .finally(() => {
      // Poll every 5 seconds
      setTimeout(pollUpdates, 5000);
    });
}

// Set the lastUpdateId on initial load
lastUpdateId = findLastUpdateId();

// Start polling
pollUpdates();

// Add the sorting toggle link
addSortToggleLink();
});
The way this efficiently updates the DOM using a fragment is code I wouldn’t have known how to write by myself without some extra research:
fragment = document.createDocumentFragment();

// Then later:
if (sortOrder === 'oldest-first') {
  // Append updates to the end for "oldest-first"
  liveUpdatesDiv.appendChild(fragment);
} else {
  // Prepend updates for "latest-first"
  liveUpdatesDiv.insertBefore(fragment, liveUpdatesDiv.firstChild);
}
I didn’t have to correct one minor bug. My Django template used this pattern:
{{ update.content|safe }}The pipe to |safe turns off Django’s default HTML escaping, which meant I could drop arbitrary HTML into my updates - useful for adding links, bold text and the occasional image.
GPT-4o’s code used this instead:
p.appendChild(document.createTextNode(` ${update.content}`));This is a neat idiom for safely inserting text into a page while escaping special characters… but that wasn’t what I wanted, and it resulted in polled updates displaying visible HTML tags. I fixed that as soon as I spotted the problem in production.
I have long been a fan of the caching trick where you tell an HTTP cache in front of your application to store content for a short period of time purely to protect against massive spikes in traffic. I helped implement this pattern at Eventbrite using Varnish, and I’ve used it on other several applications as well.
Most cache servers implement request coalescing, where even if a dozen clients all request the same page at the exact same moment only a single request is sent tot he backend, and the response is then sent to all waiting clients.
Setting a 10 second s-maxage header told Cloudflare to do exactly that. I poll every 5 seconds so that even if you get unlucky and miss the fresh content by just a second you’ll see the updated content five seconds later.
I tested this using curl:
curl -sI 'https://simonwillison.net/updates/8523.json?since=2001' | grep cfcf-cache-status: MISS
cf-ray: 8cc5a74e3d00f97f-SJC
Running that again within ten seconds returned:
cf-cache-status: HIT
cf-ray: 8cc5a7798a6cf957-SJCI used the new macOS screen tiling options to position my Django Admin window next to my live blog page so I could check that my hand-edited HTML wasn't breaking anything - my setup ended up looking like this:
Related
Created 2024-10-02T08:39:59-07:00 · Edit